
A VPN, or Virtual Private Network, is commonly used by people who want to access region-locked content. For example, perhaps your favourite Netflix series is only available in the US, while you live in the UK.
Others use a VPN for extra privacy and security, as it helps mask their real IP address. It is also popular with online gamers, because some players are unfortunately targeted by DDoS attacks that can disrupt their internet connection. With a VPN in place, any such disruption would usually affect only the VPN connection rather than taking down your entire home internet connection.
How to Set Up Your Own WireGuard VPN Server on Windows
Below, we’ll show you how to set up your own WireGuard VPN server. This guide assumes you are running Windows 7, 8.1, 10, or 11 on your PC.
Order Your VPS
Step 1: Pick a plan from our VPS Hosting lineup. In this case, 1 GB RAM is more than enough.
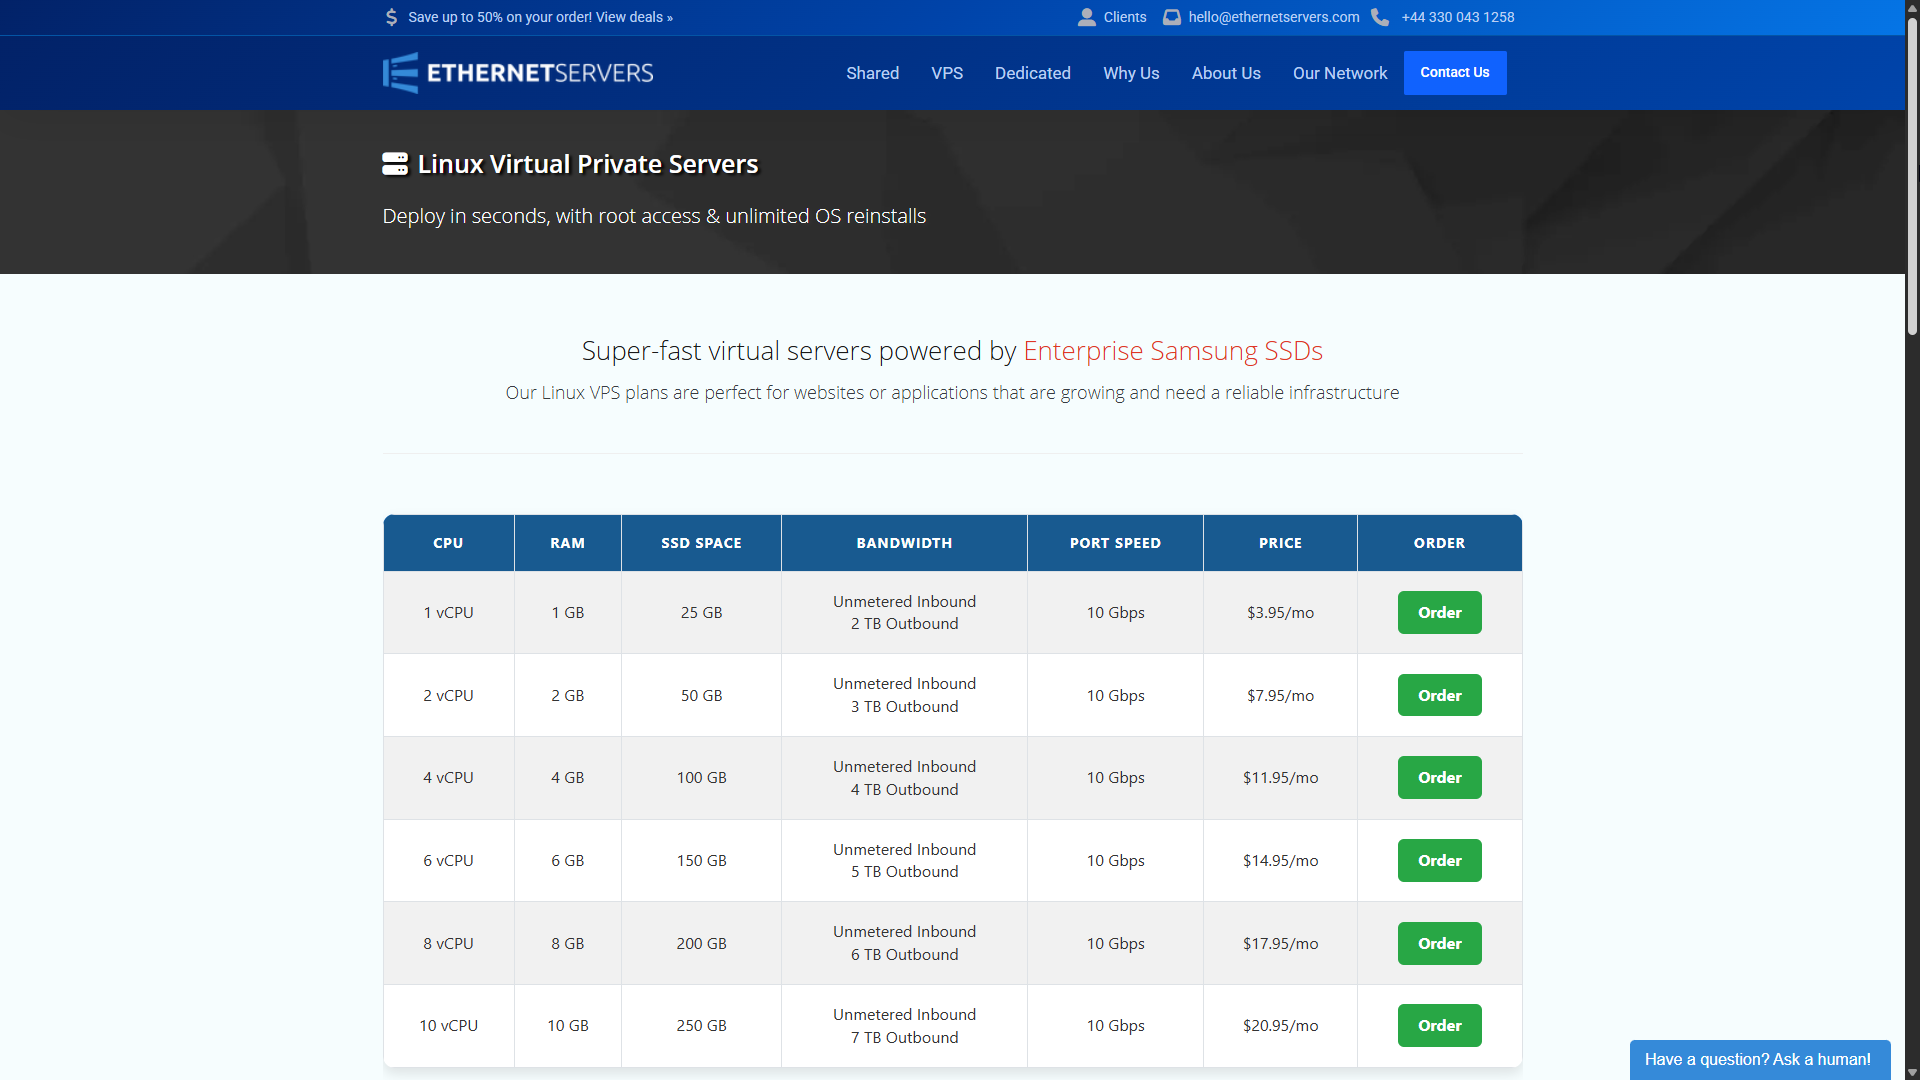
Step 2: Click the Order Now button for your chosen plan and continue through checkout. During checkout, you will see a Location option. This refers to where your WireGuard server will be hosted. We recommend selecting the location closest to where you live, as this usually gives you the lowest latency and the best performance from your VPN. Other than that, no changes are needed during the order process.
Step 3: Check your email inbox for a message with the subject VPS Welcome Email.
Connect to Your VPS
Step 4: Download and install PuTTY, which is an SSH client, on your computer. In most cases, you will want the 64-bit x86 version.
Step 5: Open PuTTY and enter the IP address from your VPS Welcome Email into the Host Name (or IP address) field.
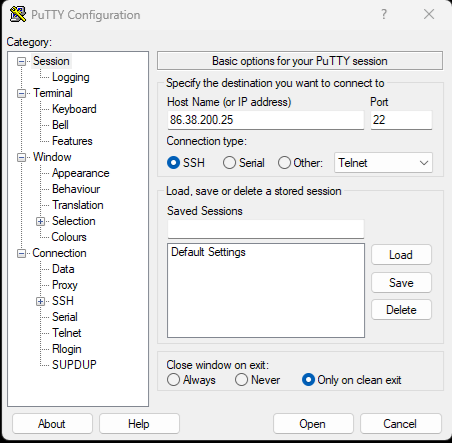
Step 6: Click Open. If a PuTTY Security Alert window appears, click Accept.
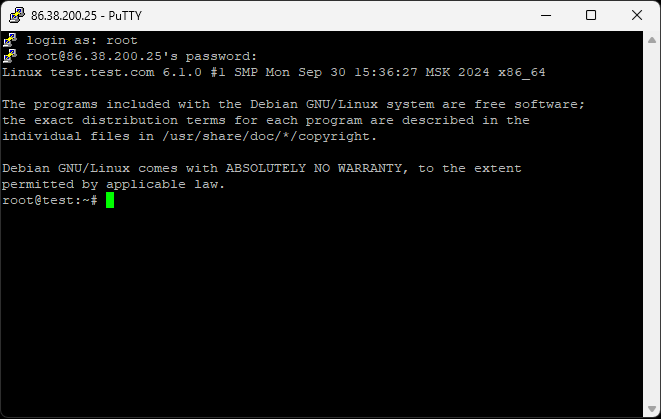
Step 7: When you see the text login as, type root and press ENTER on your keyboard.
Step 8: Next, enter the password from your VPS Welcome Email. You will not see the password appear while typing, which is completely normal. If you prefer, you can copy the password from the email and then right-click inside the PuTTY window to paste it. Again, nothing will appear on screen while pasting. Press ENTER, and you should then be logged in.
Install WireGuard
Step 9: Copy the command below, right-click in the PuTTY window to paste it, and then press ENTER:
wget https://git.io/wireguard -O wireguard-install.sh && bash wireguard-install.sh
Step 10: When the prompts appear, simply press ENTER each time. There is no need to change anything, and the installation will begin.
 Retrieve Your Client Configuration
Step 11: Once the installation is complete, you should see text saying: The client configuration is available in: /root/client.conf. To retrieve your WireGuard VPN client configuration, run this command:
cat /root/client.conf
Step 12: Copy everything from [Interface] down to PersistentKeepalive = 25, then paste it into a Notepad file.
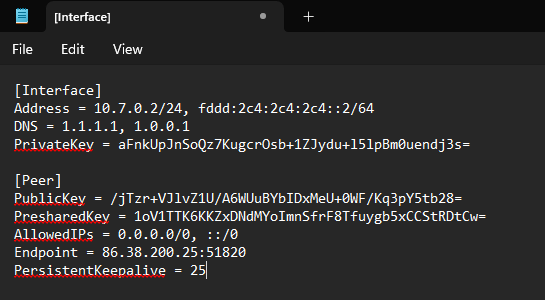
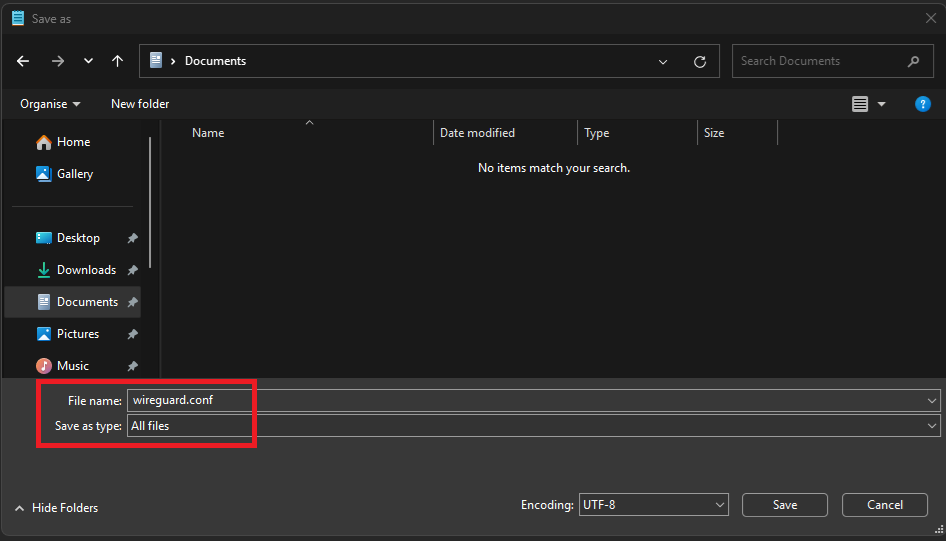
Step 13: Save the file anywhere you like on your computer as wireguard.conf. Make sure you choose All files next to Save as type.
 Import the WireGuard Tunnel
Step 14: Download the WireGuard installer, complete the installation, and then open the application.
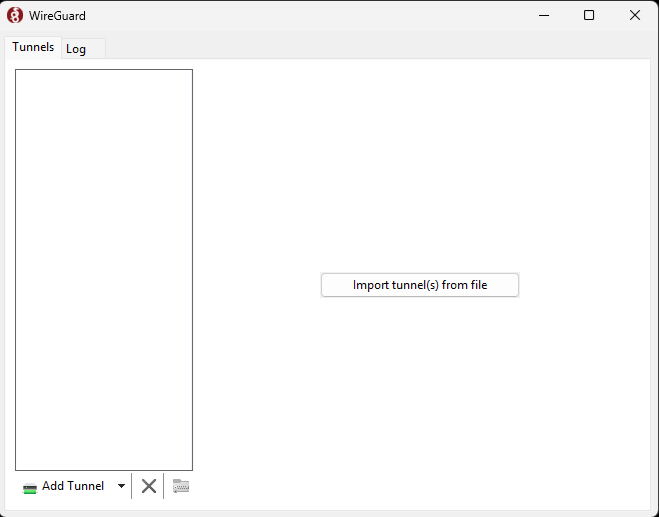
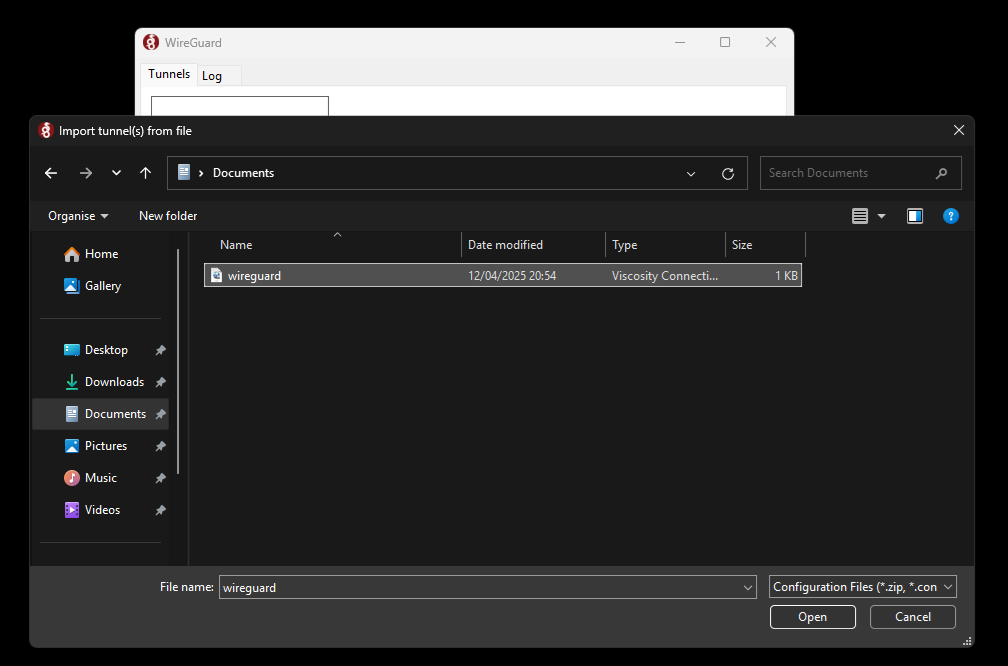
Step 15: Inside WireGuard, click Import tunnel(s) from file), choose the file you saved in Step 13, and click Open.
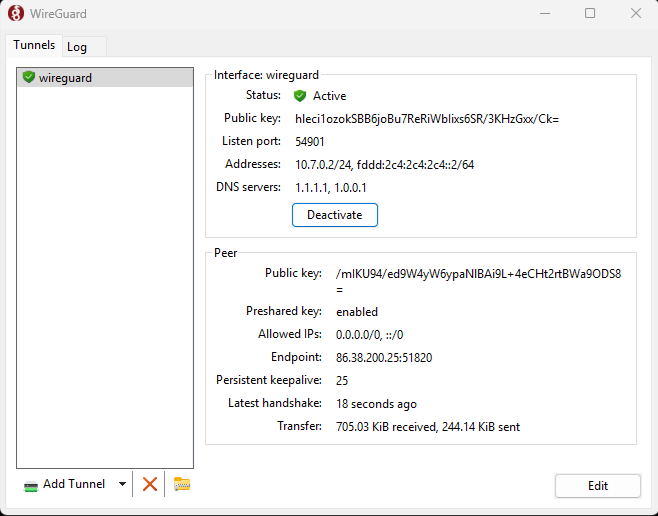
Step 16: Finally, click Activate in the WireGuard application. At that point, you should be connected successfully.
Final Notes
Congratulations — you now have your very own WireGuard VPN server up and running.
From this point on, no further setup is needed. However, you will need to open the WireGuard application and click Activate each time you want to use your VPN.
Please note: this tutorial was performed using a test server that has since been destroyed, so it is no longer a usable WireGuard server.
If you’d prefer not to do this yourself, our team can set it up for you at no extra charge. Simply order one of our plans and contact our friendly support team.

Sitejet or SitePad? Choose the Right Website Builder
When to Upgrade from VPS to Dedicated Server?

VPS vs Dedicated Server: 10 Key Differences

WordPress Multisite Setup on cPanel & Cloudflare

openSUSE Leap 16 & openSUSE Tumbleweed Now Available!
