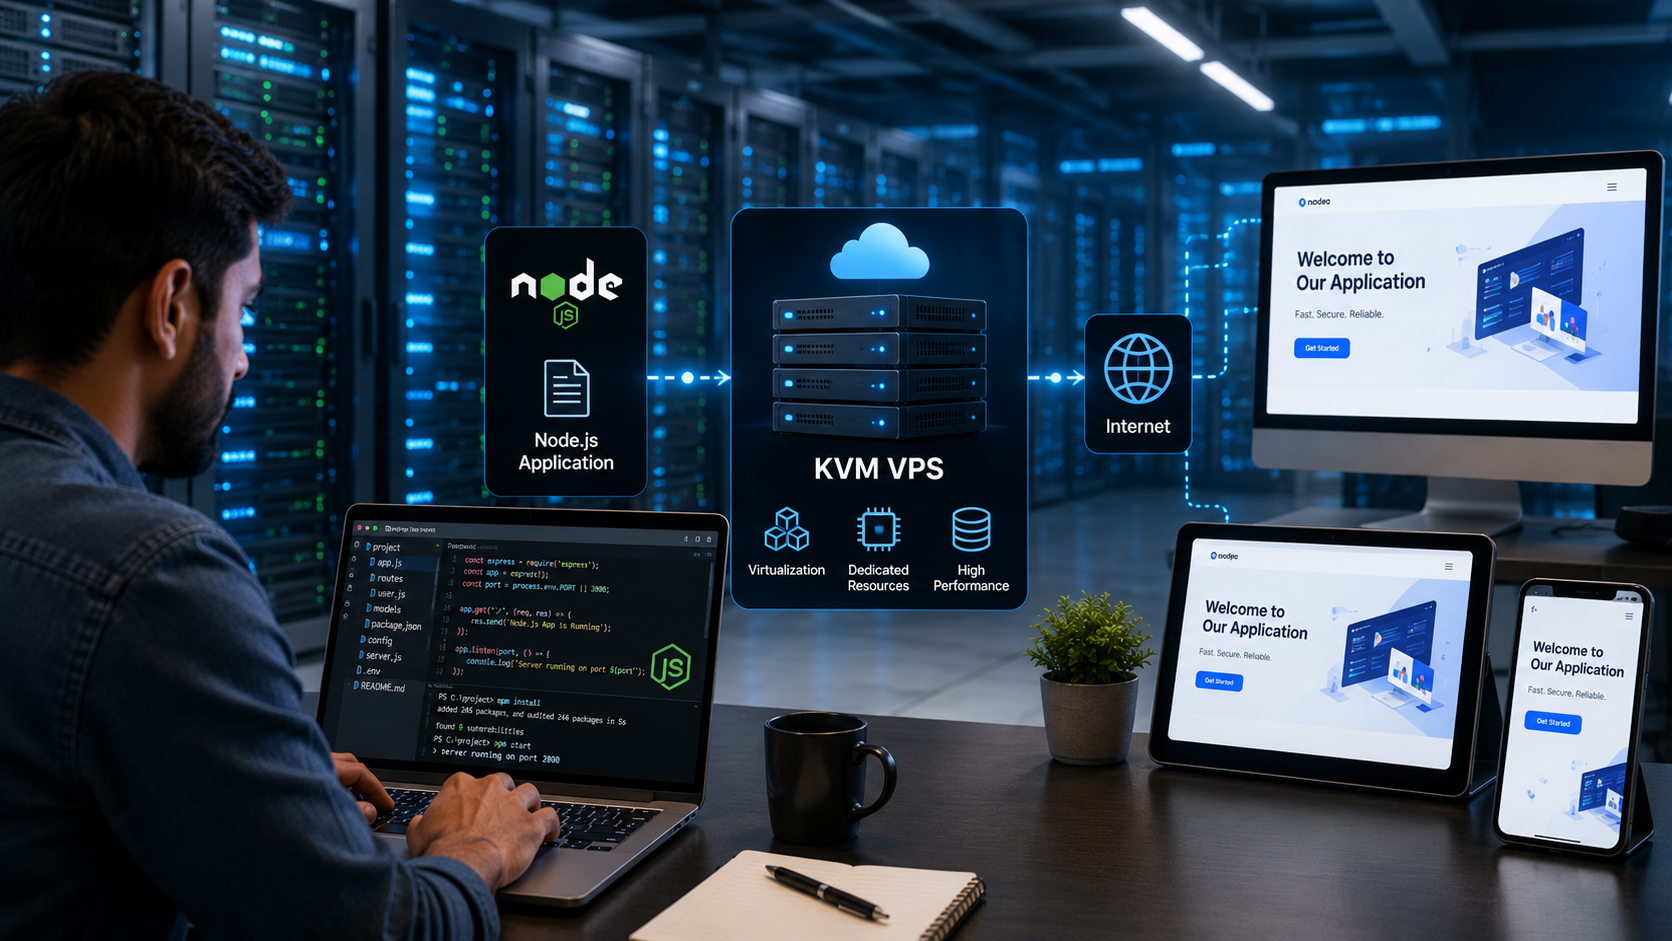
If you have built a Node.js application and you are now trying to figure out where to host it, you have probably come across the term node js vps more than once. And for good reason. A Node.js VPS gives you a private slice of server resources that you fully control. This is exactly what a Node.js app needs to run smoothly without random slowdowns or downtime caused by other websites sharing your server. In this guide, we will walk through exactly how to deploy a Node.js app on a KVM VPS, step by step, in plain language.
By the end of this article, you will understand why a vps for node js setup works better than shared hosting. You will also learn how node js vps hosting actually works under the hood and how to install node js on vps without getting stuck on confusing terminal commands.
What Is a KVM VPS and Why Does It Matter for Node.js?
KVM stands for Kernel-based Virtual Machine. It is a virtualization technology that carves out a real, isolated virtual server from a physical machine.
Unlike some cheaper virtualization types, KVM gives you your own dedicated kernel and your own operating system. It also provides guaranteed CPU and RAM that nobody else can touch. This matters a lot for Node.js because Node runs as a single-threaded event loop. It needs consistent CPU access to handle incoming requests quickly. If your server resources are shared unpredictably, your app’s response times will suffer during traffic spikes.
A node js vps built on KVM technology gives your application a stable, predictable environment to run in. That is why most serious developers and businesses choose it over shared hosting or basic container-based VPS plans.
Why Node.js Developers Prefer a VPS Over Shared Hosting
Shared hosting was never really built with Node.js in mind. Most shared hosting plans are designed around PHP and MySQL, and they often restrict long-running background processes, custom ports, and SSH access.
Node.js applications, on the other hand, usually run as a persistent process that listens on a specific port. They often need process managers, custom firewall rules, and full root access.
This is where a vps for node js setup becomes the practical choice. With a VPS, you get root access and full control over your server’s environment. You can also install any Node.js version you want. You can install a process manager to keep your app running in the background, configure a reverse proxy, and set up SSL certificates without waiting on a hosting provider’s support team to do it for you.
Choosing the Right Node.js Version Before You Deploy
Before jumping into deployment, it helps to know where Node.js stands as of 2026.
Node.js 24 is currently the active LTS release. It receives regular security patches and is considered stable for production use, with support extending into 2028.
Node.js 22 is still supported under maintenance LTS until April 2027. It remains usable but is no longer the recommended starting point for new projects.
Node.js 26 was released as a “Current” version in May 2026. It is expected to move into full LTS status in October 2026, but until then it is better suited for testing rather than live production apps.
For most people setting up node js vps hosting, the safe recommendation is to go with the current Active LTS version. It balances new features with long-term stability and security support.
Setting Up Your KVM VPS Before Installing Node.js
Once you have picked a Node.js VPS plan, the first step is logging into your server through SSH.
Most VPS providers, including Ethernet Servers, will give you an IP address after your server is provisioned. They will also provide a root username and password. You will use an SSH client, or simply the terminal on Mac and Linux, or a tool like PuTTY on Windows, to connect to your server.
After logging in, it is a good habit to update your server’s package list before installing anything new. This makes sure you are pulling the latest security patches and software versions rather than outdated ones sitting in the default repository. A quick update and upgrade command run through your package manager will take care of this in under a minute on most VPS plans.
How to Install Node.js on VPS Step by Step
Now comes the part most people are actually searching for: how to install node js on vps the right way. There are a few different methods, but the most reliable one for production servers is using NodeSource, which maintains official Node.js repositories for Linux distributions.
Install Node.js Using NodeSource
You start by downloading the setup script for the Node.js version you want, whether that is the current LTS or a specific version your app depends on.
Running this script adds the correct repository to your server. After that, you can install Node.js using your package manager in a single command.
Once installed, you can confirm everything worked by checking the Node.js and npm version numbers directly in your terminal.
Using a Version Manager
Some developers prefer using a version manager instead. It allows switching between multiple Node.js versions on the same server without conflicts. This is especially useful if you are running more than one application that depends on different Node.js versions.
Either approach works fine on a KVM VPS since you have full control over the environment. That is something you simply do not get with restricted shared hosting.
Uploading and Configuring Your Application
Once Node.js is installed, the next step is getting your actual application onto the server.
You can do this by cloning your project directly from a Git repository if your code is already version controlled. You can also transfer files using SFTP.
After your files are on the server, you will need to install your project’s dependencies. Node.js handles this through its package manager by reading your project’s dependency file.
It is worth double checking your environment variables at this stage too. Most Node.js apps rely on a configuration file for things like database credentials, API keys, and port numbers. These should never be hardcoded directly into your application files for security reasons.
Keeping Your Node.js App Running with a Process Manager
Here is something beginners often miss. If you simply run your Node.js app using the standard start command, it will stop the moment you close your terminal session or if the app crashes for any reason. This is a real problem for production apps that need to stay online continuously.
That is why almost every experienced developer running a node js vps setup uses a process manager like PM2. A process manager keeps your app running in the background. It automatically restarts the application if it crashes and can even be configured to start your app whenever the server reboots. Setting this up usually takes just two or three commands. It makes a massive difference in how reliably your app stays online.
Setting Up a Reverse Proxy and SSL
Running your Node.js app directly on port 80 or 443 is technically possible, but it is not the standard practice. Most production setups use a web server like Nginx as a reverse proxy sitting in front of the Node.js application.
With this setup, visitors hit Nginx first, and Nginx quietly forwards their requests to your Node.js app running on an internal port.
Using a reverse proxy has a few real benefits. It lets you run multiple applications on the same VPS behind different domain names. It also handles SSL certificates more efficiently and adds an extra layer of protection between the outside world and your actual application code.
Adding a free SSL certificate through Let’s Encrypt and configuring it alongside Nginx is a standard part of setting up node js vps hosting the correct way. It only takes a few extra minutes once your reverse proxy is in place.
Firewall and Security Basics You Shouldn’t Skip
A lot of guides skip this part, but it genuinely matters.
Once your app is live, you should configure a basic firewall to allow traffic only on the ports you actually need. These are typically SSH, HTTP, and HTTPS. Leaving unnecessary ports open is one of the easiest ways for a server to get targeted by automated bots scanning for vulnerabilities.
It is also worth disabling root login over SSH after creating a separate user account with sudo privileges. You should set up SSH key authentication instead of relying purely on passwords. These steps take maybe ten minutes in total. However, they meaningfully reduce your server’s exposure to common attacks.
Monitoring and Maintaining Your Node.js VPS
Deployment is not really a one-time task.
Once your app is live, keeping an eye on server resources like CPU, RAM, and disk usage will help you catch problems before they turn into downtime.
Most process managers offer basic monitoring built in. You can pair this with your VPS provider’s own resource dashboard for a fuller picture.
It is also smart to keep your Node.js version updated within your chosen LTS line. Security patches are released regularly, and running an outdated version leaves known vulnerabilities unaddressed.
Why KVM Specifically Works Well for Node.js Hosting
Some VPS providers offer OpenVZ or container-based virtualization instead of KVM. While these options can be cheaper, they come with real limitations.
Container-based virtualization shares the host server’s kernel. This restricts certain configurations and can lead to less predictable performance during traffic spikes.
KVM avoids this entirely by giving your Node.js VPS a fully isolated environment with dedicated resources. That is a big reason it has become the standard choice for anyone serious about running production Node.js applications.
Final Thoughts
Deploying a Node.js app does not have to be complicated once you understand the basic building blocks. These include picking the right Node.js version, setting up your KVM VPS correctly, installing Node.js properly, keeping your app alive with a process manager, and securing everything with a reverse proxy and firewall.
Once this setup is in place, updating or redeploying your app becomes a quick, repeatable process rather than something you have to figure out from scratch every time.
Frequently Asked Questions
For beginners, a KVM-based VPS with at least 1-2GB RAM and SSD storage is a solid starting point. It gives you enough headroom to run Node.js comfortably along with a process manager and reverse proxy, without paying for resources you do not need yet.
The safest method is using NodeSource’s official setup scripts or a version manager, since both let you install a specific Node.js version cleanly and switch between versions later if needed, without conflicting with your system’s default packages.
Yes, in almost every practical case. Shared hosting restricts background processes, custom ports, and root access, all of which Node.js applications typically need. A VPS gives you full control over your server environment.
While not strictly required, Nginx as a reverse proxy is highly recommended. It allows you to run multiple apps on one server, simplifies SSL certificate management, and adds a layer of security between your app and incoming traffic.
As of 2026, Node.js 24 is the current Active LTS release and the recommended choice for new production deployments, since it receives regular security updates and offers long-term stability.